
Automotive wiring is a source of anxiety and frustration for a lot of us car enthusiasts. After numerous projects, I’ve finally become comfortable with it, but there is one task I still hate to do. That’s tapping into a perfectly good wiring harness to add a new circuit or accessory. Or worse yet, cutting the factory connectors off to wire in an aftermarket component like a stereo.
Like it or not, sometimes tapping into a circuit is a necessity. I’ve tapped into my car’s instrument lighting, for instance, to make sure a gauge pod shared the dashboard lighting’s dimming function. We’ve probably all tapped a brake light circuit for a trailer brake controller. Or maybe a reverse light circuit to install an aftermarket back-up camera. Whether it’s to piggy-back on a shared function or to pick up a signal, there are plenty of legitimate reasons to splice into a harness. And countless ways to do it wrong.
The most common way used to be simply cutting the feed wire and twisting both its new ends to the additional one. Depending on how it was secured, you might have created anything from an unreliable circuit to a full-on fire hazard. Twist-on wire nuts, crimp connectors, solder, electrical tape – none offers a truly reliable connection once you’ve cut the main circuit.
For years a better solution seemed to be 3M’s Scotchlok™ connectors. These insulated crimp-ons form a metal “bridge” between the supply wire and the new circuit – in theory. The problem is they often fail to bite through either wire’s insulation, making poor or intermittent contact. The same is true of other “insulation displacement connectors” like T-taps. At least they keep the original circuit intact, though they add a lot of bulk to the harness.
Here are three other ways to tap into a wiring harness without compromising its integrity.
Basic twist
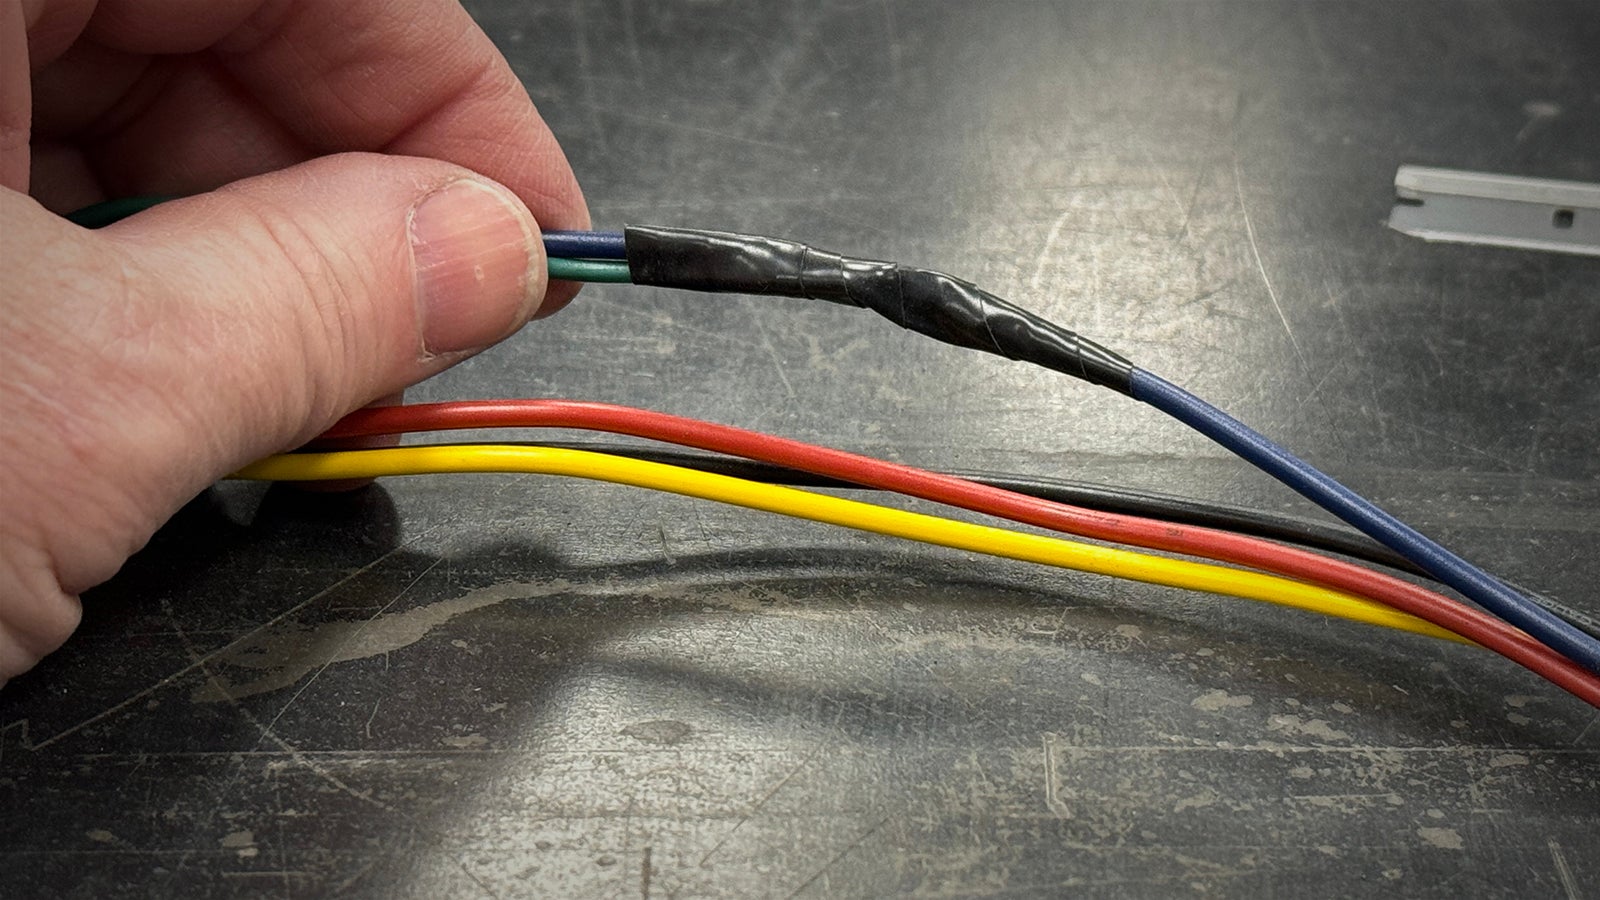
This method is straightforward and simple, if not the most robust. Here, you strip the insulation on the wire you’re tapping, exposing an inch of bare strands without cutting through it. Then, take the add-on wire and strip an inch of insulation off the end you’re connecting. Twist the strands of exposed wire to form a tight bunch, then wrap it firmly around the exposed feed wire. Wrap the splice in electrical tape starting at one end of the joint, enclosing the new wire with the original.
This joint should be reliable and flexible enough to feed through the vehicle with minimal additional bulk. Soldering the joint before taping it closed would make it more reliable, but would also make it rigid and bulkier. This method is also less easily reversible should you no longer want the add-on circuit later.


Split and twist
A variation on the basic wrap is the split-and-twist method. Again, you’ll still strip back an inch or so of insulation from both wires without cutting the feed wire. Next, however, you’ll split the strands in the feed wire, creating an opening in the middle. And before twisting the end of the add-on wire, you’ll split it as well.
Next you’ll feed the split end of the new wire through the opening in the feed wire. Once through, twist the feed wire opening closed, then wrap each of the split ends around in opposite directions. Create a good, tight twist, then lay the new wire against the feed wire and wrap it in electrical tape. Here, too, a solder joint will make it more durable at the expense of rigidity and extra bulk.


Tap-it connectors
A relative newcomer, Tap-it connectors are something of an evolution of the old Scotchlok design. Instead of bridging two wires by biting into the edge of the insulation, they use a threaded pin to pierce right through the center for a solid connection. The add-on wire is fed into the other end, making solid contact with the center post.
Not only is this quick and painless to install, it’s also fully reversible. Better still, it leaves the original wiring intact with little more than a pinhole in the insulation. If there’s a downside to these connectors, it’s got to be the perpendicular connection they create. Depending on where these are installed, it may or may not be an issue. Regardless, they’re hard to beat on just about every count.


