


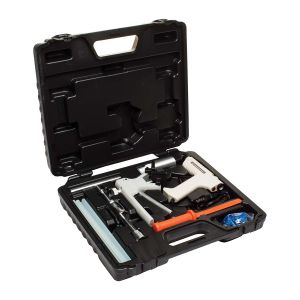
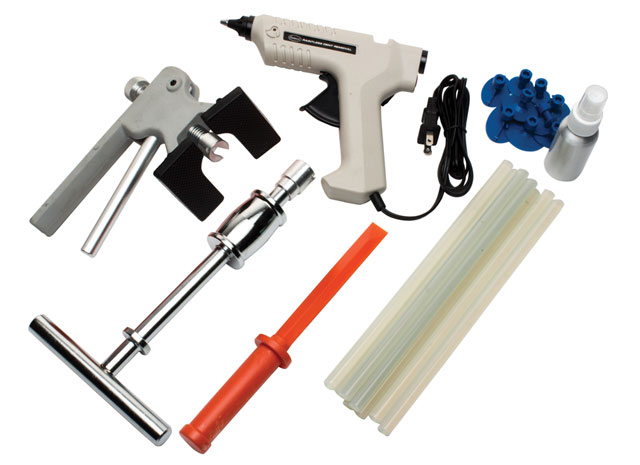
- (1) Lever Type Dent Puller
- (1) Slide Hammer Dent Puller
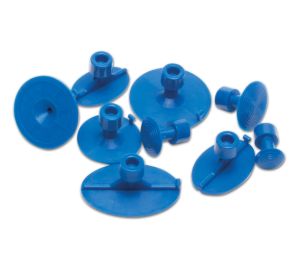
- (9) Plastic Pull Buttons Click here to purchase extra
- (1) Electric Hot Glue Gun
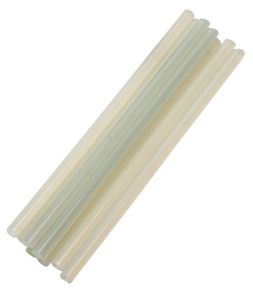
- (8) Glue Sticks Click here to purchase extra
- (1) Nylon Scraper
- (1) Aluminum Spray Bottle
- (1) Blow Molded Case
1 year Warranty Included
100% Satisfaction Guarantee Since 1978
We stand behind our solutions and customers.
Pull dents out of metal body panels like a pro with this DIY dent removal kit. Thanks to our at-home dent remover system, small fender benders or a stone to the door no longer have to mean an expensive trip to the body shop. We provide everything you need to restore the metal without even needing touch-up paint.
Why do you need an Eastwood Paintless Dent Removal Kit?
NOTE - Not recommended for plastic bumper covers and trim pieces.
Get the perfect solution for paintless dent repair when you order this kit. The Eastwood dent removal tool kit comes with everything you need for fast and effective repairs It’s designed specifically for use on automotive sheet metal, saving you money on professional dent removal and allowing you to avoid expensive paint work.
DIY Dent Repair at Home
This car dent remover kit contains dent puller tools along with other easy-to-use components for reversing shallow dents and dings. Our paintless dent repair how-to guide below walks you through the simple process provides helpful tips for how to use each of the paintless dent repair tools. We’ve also created multiple videos showing step-by-step how to remove dents on cars and trucks. In just minutes, you’ll be able to reverse dents from hail damage, parking lot dings and other common minor dents.
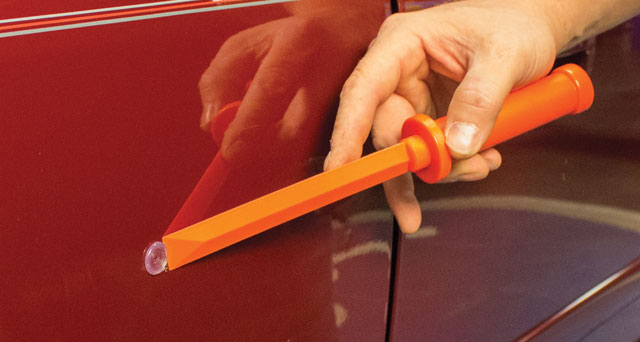
Select the Plastic Pull Button that best matches the size and shape of the dent to be pulled. Generally, the very center of a dent is the best placement however larger dents may benefit from multiple pulls from different locations.
Using a non-permanent type marker or masking tape, trace a circle around the outside of the planned location of the Pull Button
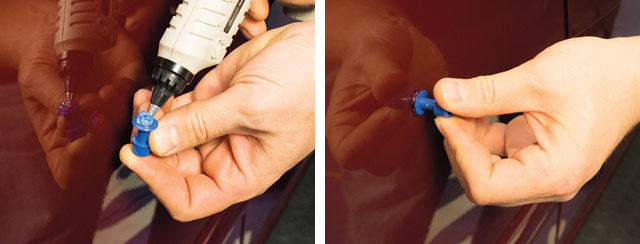
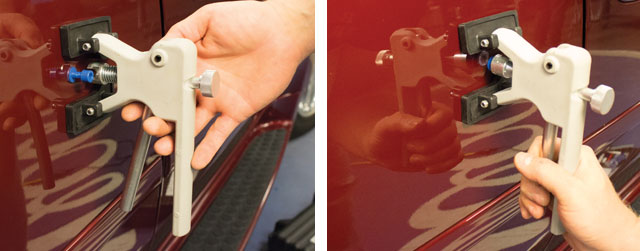
Immediately apply the face of the Pull Button to the previously outlined area and hold firmly in place for 10 to 15 seconds.
Wait several minutes for the heated glue to solidify then hook the slotted feature of either the Levered Puller or Slide Hammer shaft over the “T” feature of the Pull Button. Operate the chosen pulling device to remove damage.
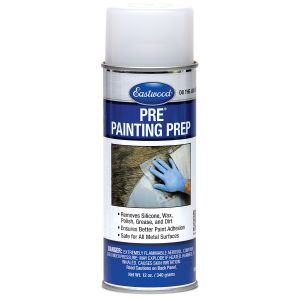
Fill the Aluminum Spray Bottle 3/4 full of denatured alcohol (not included).
Apply the denatured alcohol liberally to the glue area while using the Nylon Scraper to gently wedge between the Pull Button and paint surface.
Carefully remove glue with provided nylon scraper. Note: Be careful if using on a vehicle that has been resprayed. The paint is not bonded as well as a factory finish and may lift.
The smallest glue button is 5/8th inch OD and they range up to 1 5/8th inch OD. in size.
| Input Voltage: | 120 VAC, 60 Hz |
| Power Requirements: | 80 watts |
| Plug Type: | 2-prong, polarized |
| Cord Length: | 60" (1.5m) |
| Glue Stick size: | 7/16" x 10-5/8" |
| Glue Stick material: | Polyethylene |
| Pull Button Material: | Nylon |
Our customer Adan from Texas was unlucky enough to clip a deer causing what appeared to be devastating damage to his driver side rear door
Using the Eastwood PDR kit along with patience and time allowed him to transform what appeared to most as a lost cause, back into a usable clean looking door. Imagine the money saved from the body shop with one kit.


